
")

_web")


_web")

")

")
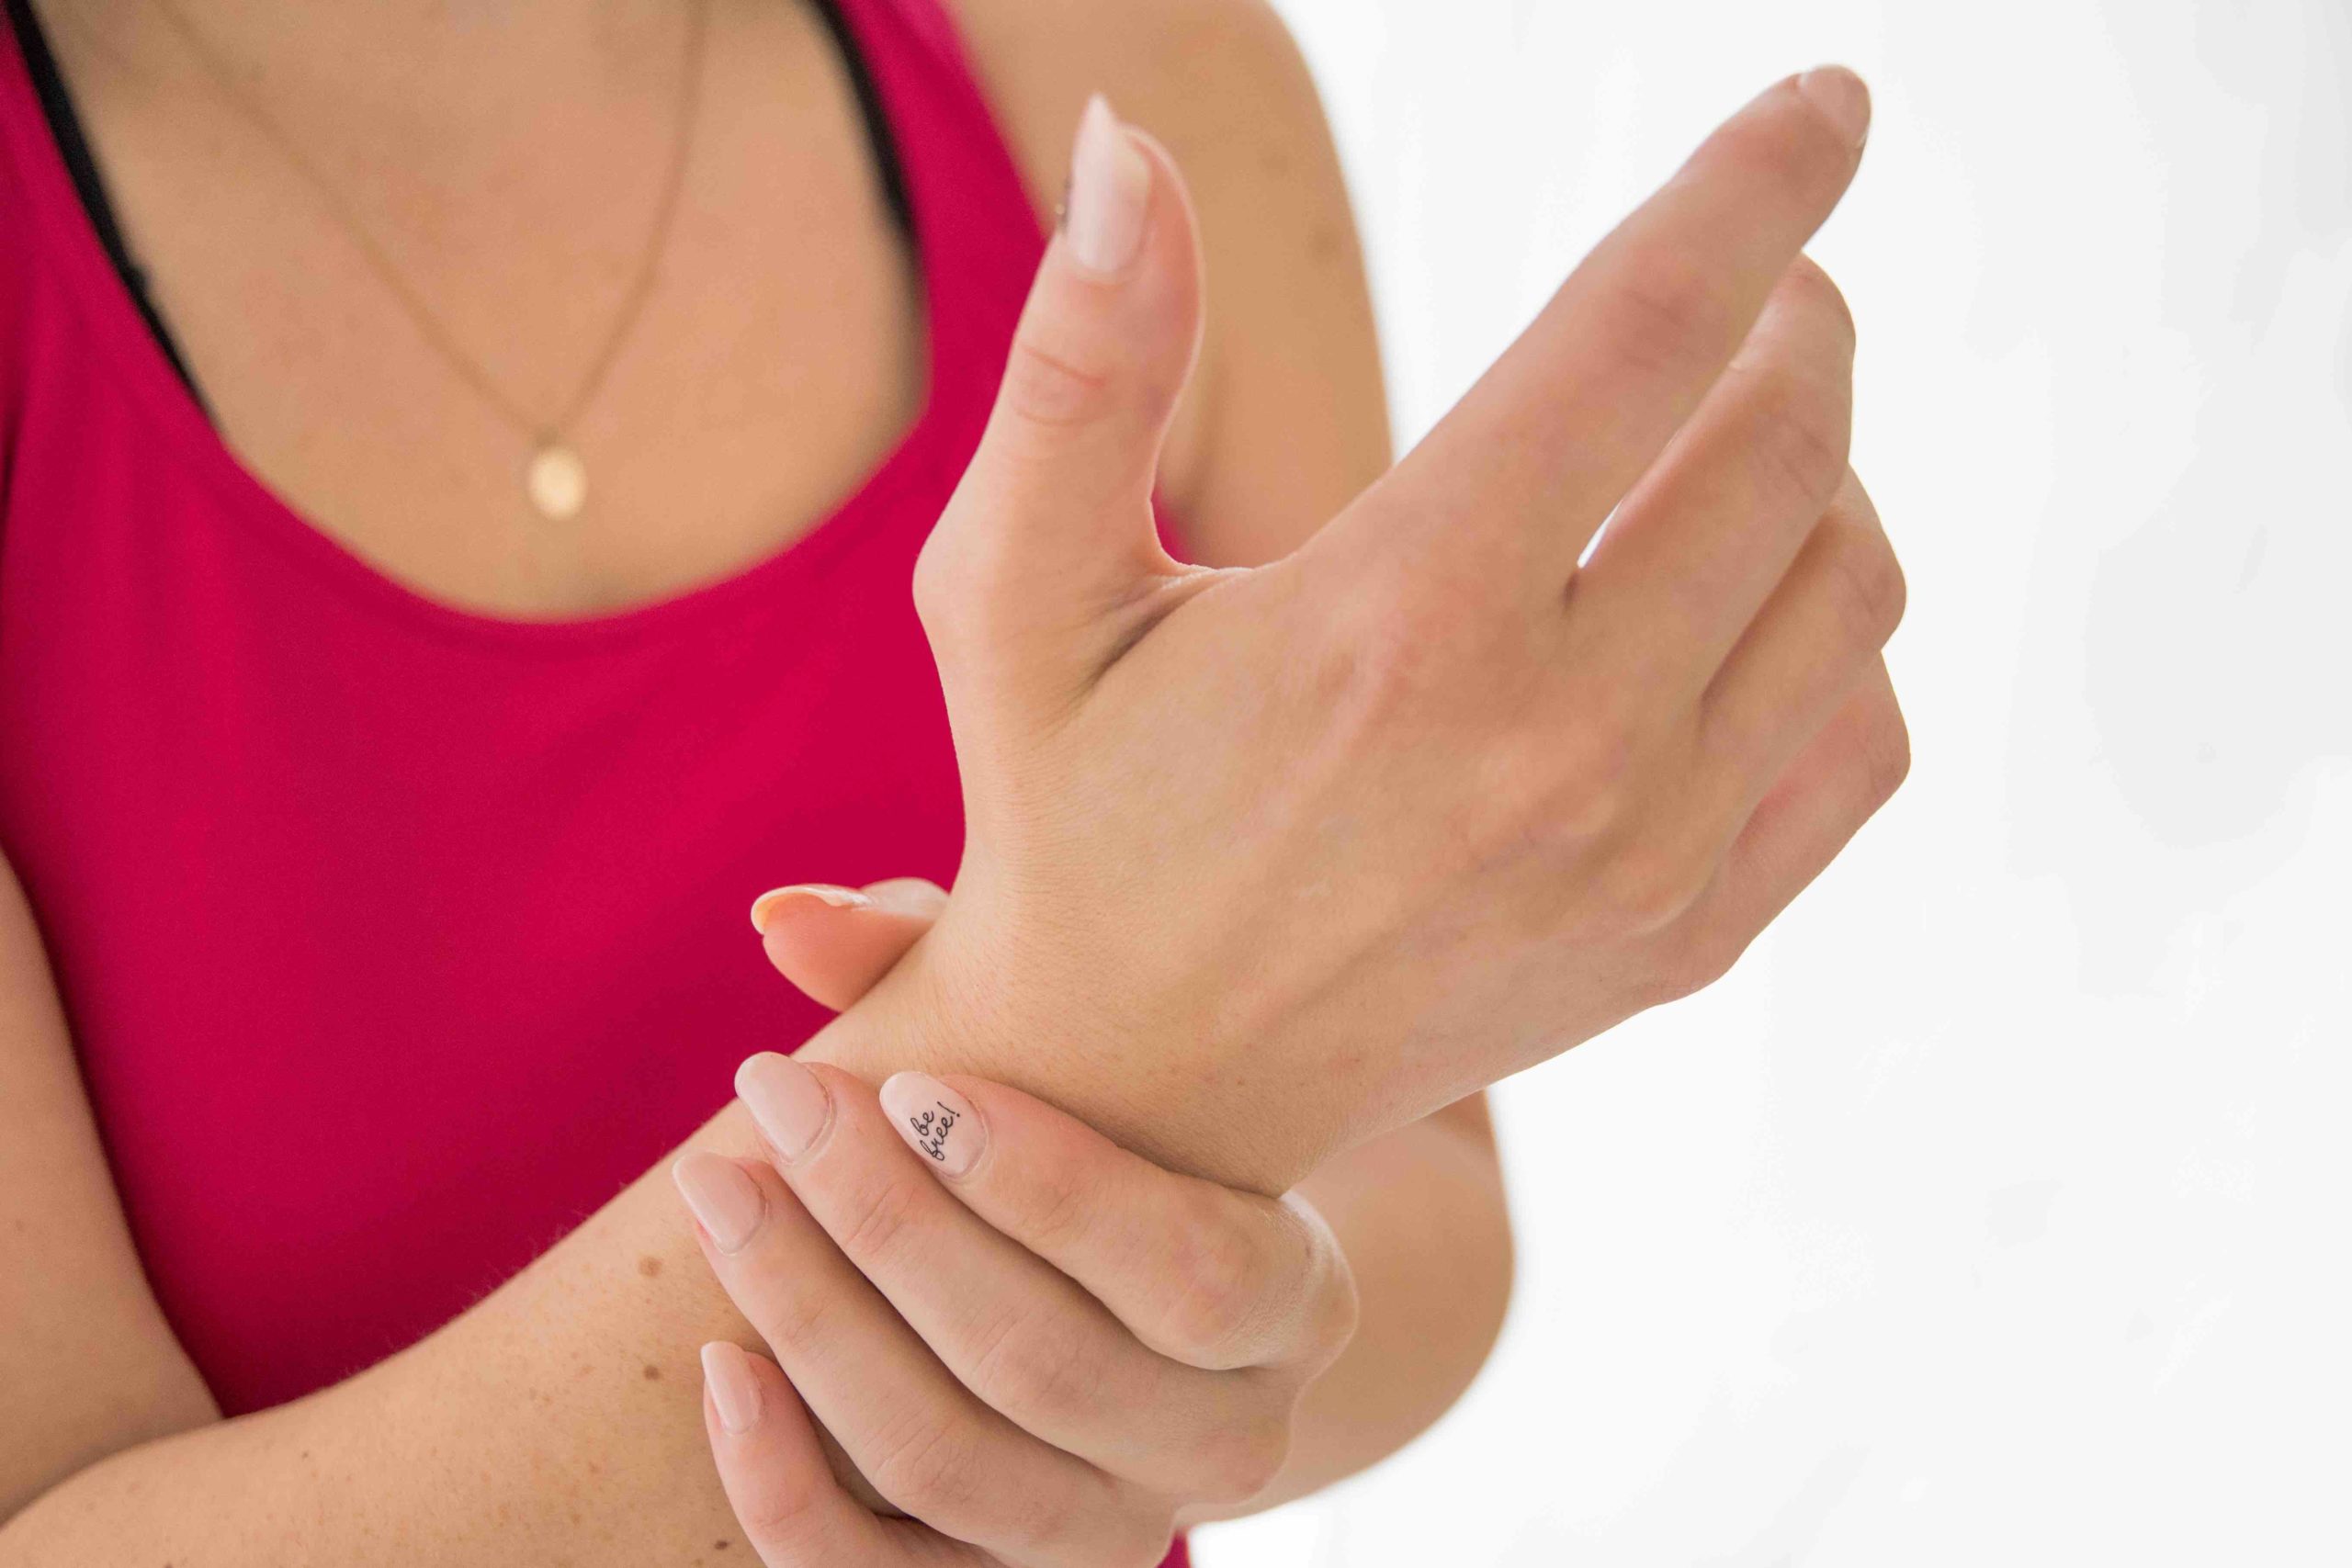
Whether you’re a beginner or a more seasoned practitioner, you might encounter pain in your wrists. I know I have in the past, and I still do from time to time if I don’t practice mindfully.
Rule of thumb, in yoga, pain is a red flag. The body is trying to tell you to stop whatever you’re doing right now. Discomfort or mental discouragement are totally different, and we’ll talk about those at another time.
If you push through pain, over time you will probably get injured. If you’re already injured and you keep going the same way, first, it won’t heal, second, you will aggravate your injury.
SIGNS OF A SERIOUS WRIST INJURY INCLUDE:
- Stabbing, aching, or dull pain in the wrist during the activity
- Snapping or popping followed by pain
- Inflammation (stiffness, swelling, pain, redness, heat)
- Pain that persists after the activity
- Weak grip while holding objects
If you have any of those, seek the attention of a medical professional. Since I’m not a doctor of any kind, any suggestions below should be run past your doctor when you have his ok to do yoga.
WHY DO MY WRISTS HURT? THE 5 TOP REASONS!
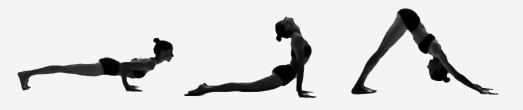
A. Repetitive Stress aka weight-bearing poses and/or bad alignment: In a lot of poses, we bare our weight on the wrists… they are not used to it. If you enjoy a Vinyasa based class, every Sun Salute and Vinyasa flow between sides, including Plank Pose, Chaturanga Dandasana (Four-Limbed Staff Pose), Urdhva Mukha Svanasana (Upward-Facing Dog Pose), and Adho Mukha Svanasana (Downward-Facing Dog Pose), are all weight baring for the wrists. And, we do them again and again! And then, on top of it, we had arms balance and inversions to the mix! The repetition alone can lead to overuse, but if the alignment is off and we repeat these mistakes again and again through class, we put stress on the joint.
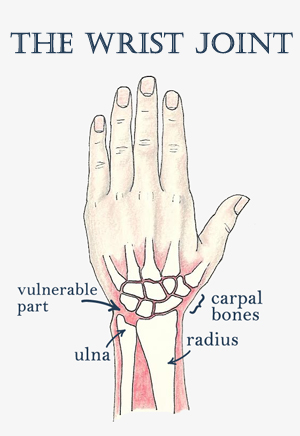
B. The wrist is a vulnerable joint: The wrist is a small joint. It’s full of small bones and all those little bones can get compressed together. Also, as you see in the drawing from my friend Jenna, the ulna runs on the pinky side of the forearm and it’s slightly shorter than the radius. Because of that space, this side of the wrist is more vulnerable to injuries if you bear weight on that side of the hand. They are also many ligaments that join the wrist bones, tendons that link the forearm muscles to the fingers, and nerves. Pain can then also arise from strain or irritation of the tendons or compression of the nerves.
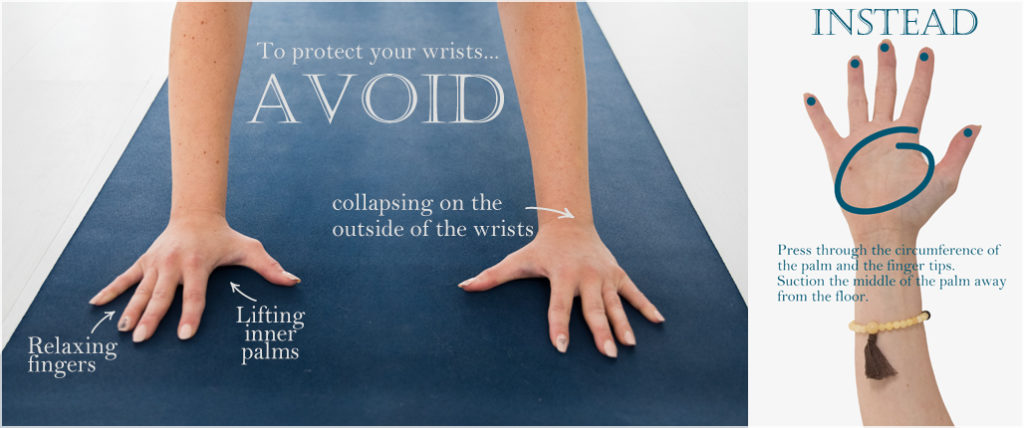
C. Not engaging the hands: If your hand is “at rest” in a pose like Downward-Facing Dog Pose, you’ll be collapsing most of the weight in the joint, and probably on the outside, where it’s most vulnerable (also see the photo below at number 6).
D. Weak arms, shoulders, and core: if you’re not using the muscles surrounding the wrist, helping you to hold your weight up, you’re asking your wrists to work harder as you dump all your weight on them. You could be distracted, misaligned or simply weak. In poses like tabletop, the core will relieve the pressure on the wrists. In Downward-Facing Dog, forearms and shoulders will help you, as well as a distribution the weight evenly between the hands and feet. Those a just a couple of examples.
Drawing © Jenna Mitchell , Yoga teacher and artist. Follow her work here.
WHAT DO I DO? 10 TRICKS TO HELP YOU PROTECT YOUR WRISTS!
- If you do feel any symptoms listed earlier, skip completely the poses that cause pain.
- Don’t be afraid to modify; use your knees, your elbows, your fingertips
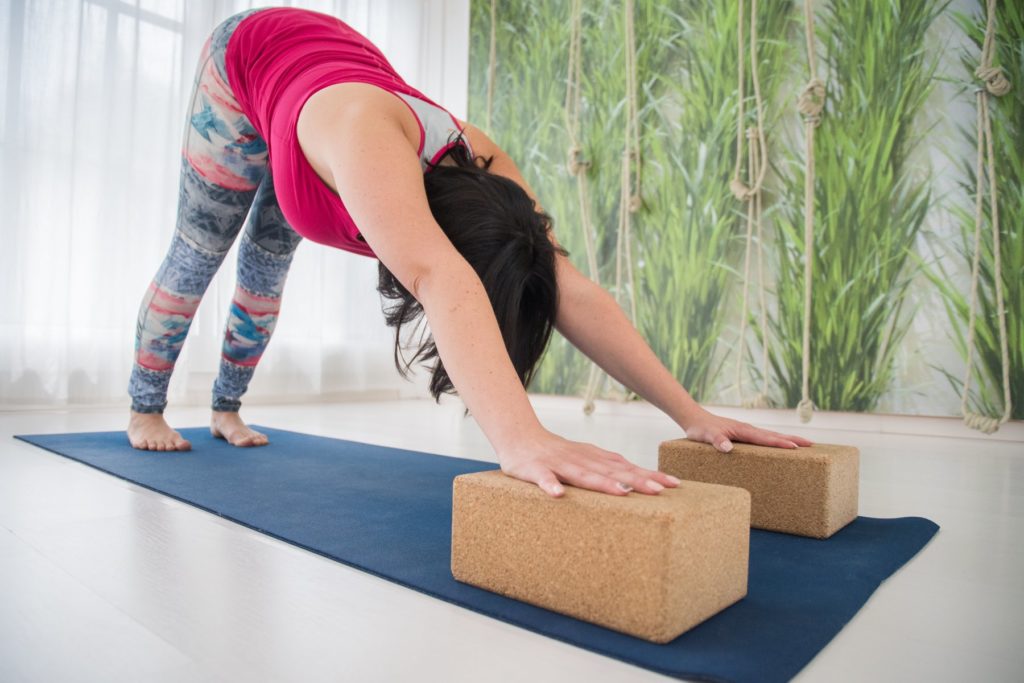
- Use props: blocks under hands, rolled mat, foam or wood wedge, the wall…
4. Take the time to warm up before Sun Salutes, arm balances, or inversions. Another great reason to arrive to class early!
5. Be mindful; work on better alignment of the shoulders, arms, and hands and engage all the muscles properly.
6. Learn a strong foundation and distribute your weight through the whole palm, the base of all the fingers, and the fingertips. Suction the middle of the palm away from the floor.
7. Connect with your body to respect your edge. Honor your practice.
8. Begin a program of exercises to stretch and strengthen the wrists. Stay tuned for an article on the subject!
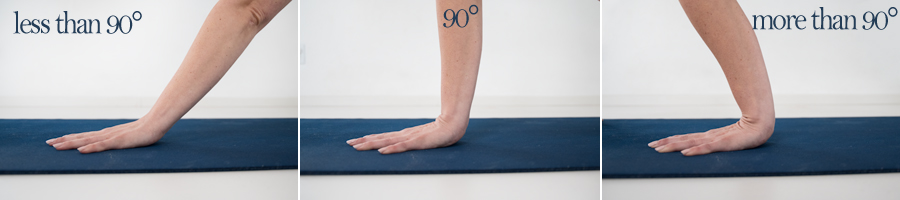
9. If you have been skipping poses and feel ready to reintegrate some weight baring poses in your practice, go slowly and progressively. Start by working with poses where you’re not in full extension, with less than 90° like Adho Mukha Svanasana (Downward-facing Dog), then 90 degrees extension (like a table top, with little weight on it, than add more weight like in plank) and only attempt pose that require more than 90° extension, like Bakasana (Crane Pose) when your wrists are strong and stable.
10. Have fun and relax. It’s just yoga. Sometimes when we try to hard, we make it actually more difficult for ourselves. Learn to let go.
Please comment below if you have any questions I haven’t covered here. Prevention is the key! If your wrists are already hurting, I hope you feel better soon!
❤️
Erika

_web")


+ show Comments
- Hide Comments
add a comment